This project builds a replacement SSD for Benq S6.
First, let me talk about some backgrounds of this machine. In 2006, Microsoft and Intel were trying to launch a new class of computers called Ultra-mobile PC or UMPC for short. They are handheld computers that run full-featured Windows operating systems, like Windows XP or Windows Vista. Typically equipped with a screen of 5 inches to 7 inches, so that's smaller than a typical subnotebook or even netbooks. These machines were quite expensive back then, costing over a grand. But as one could imagine, Windows along with applications optimized for mouse and keyboard run poorly on these small and low-performance devices. So it might be hard to justify spending a lot of money on buying one of these, toys.
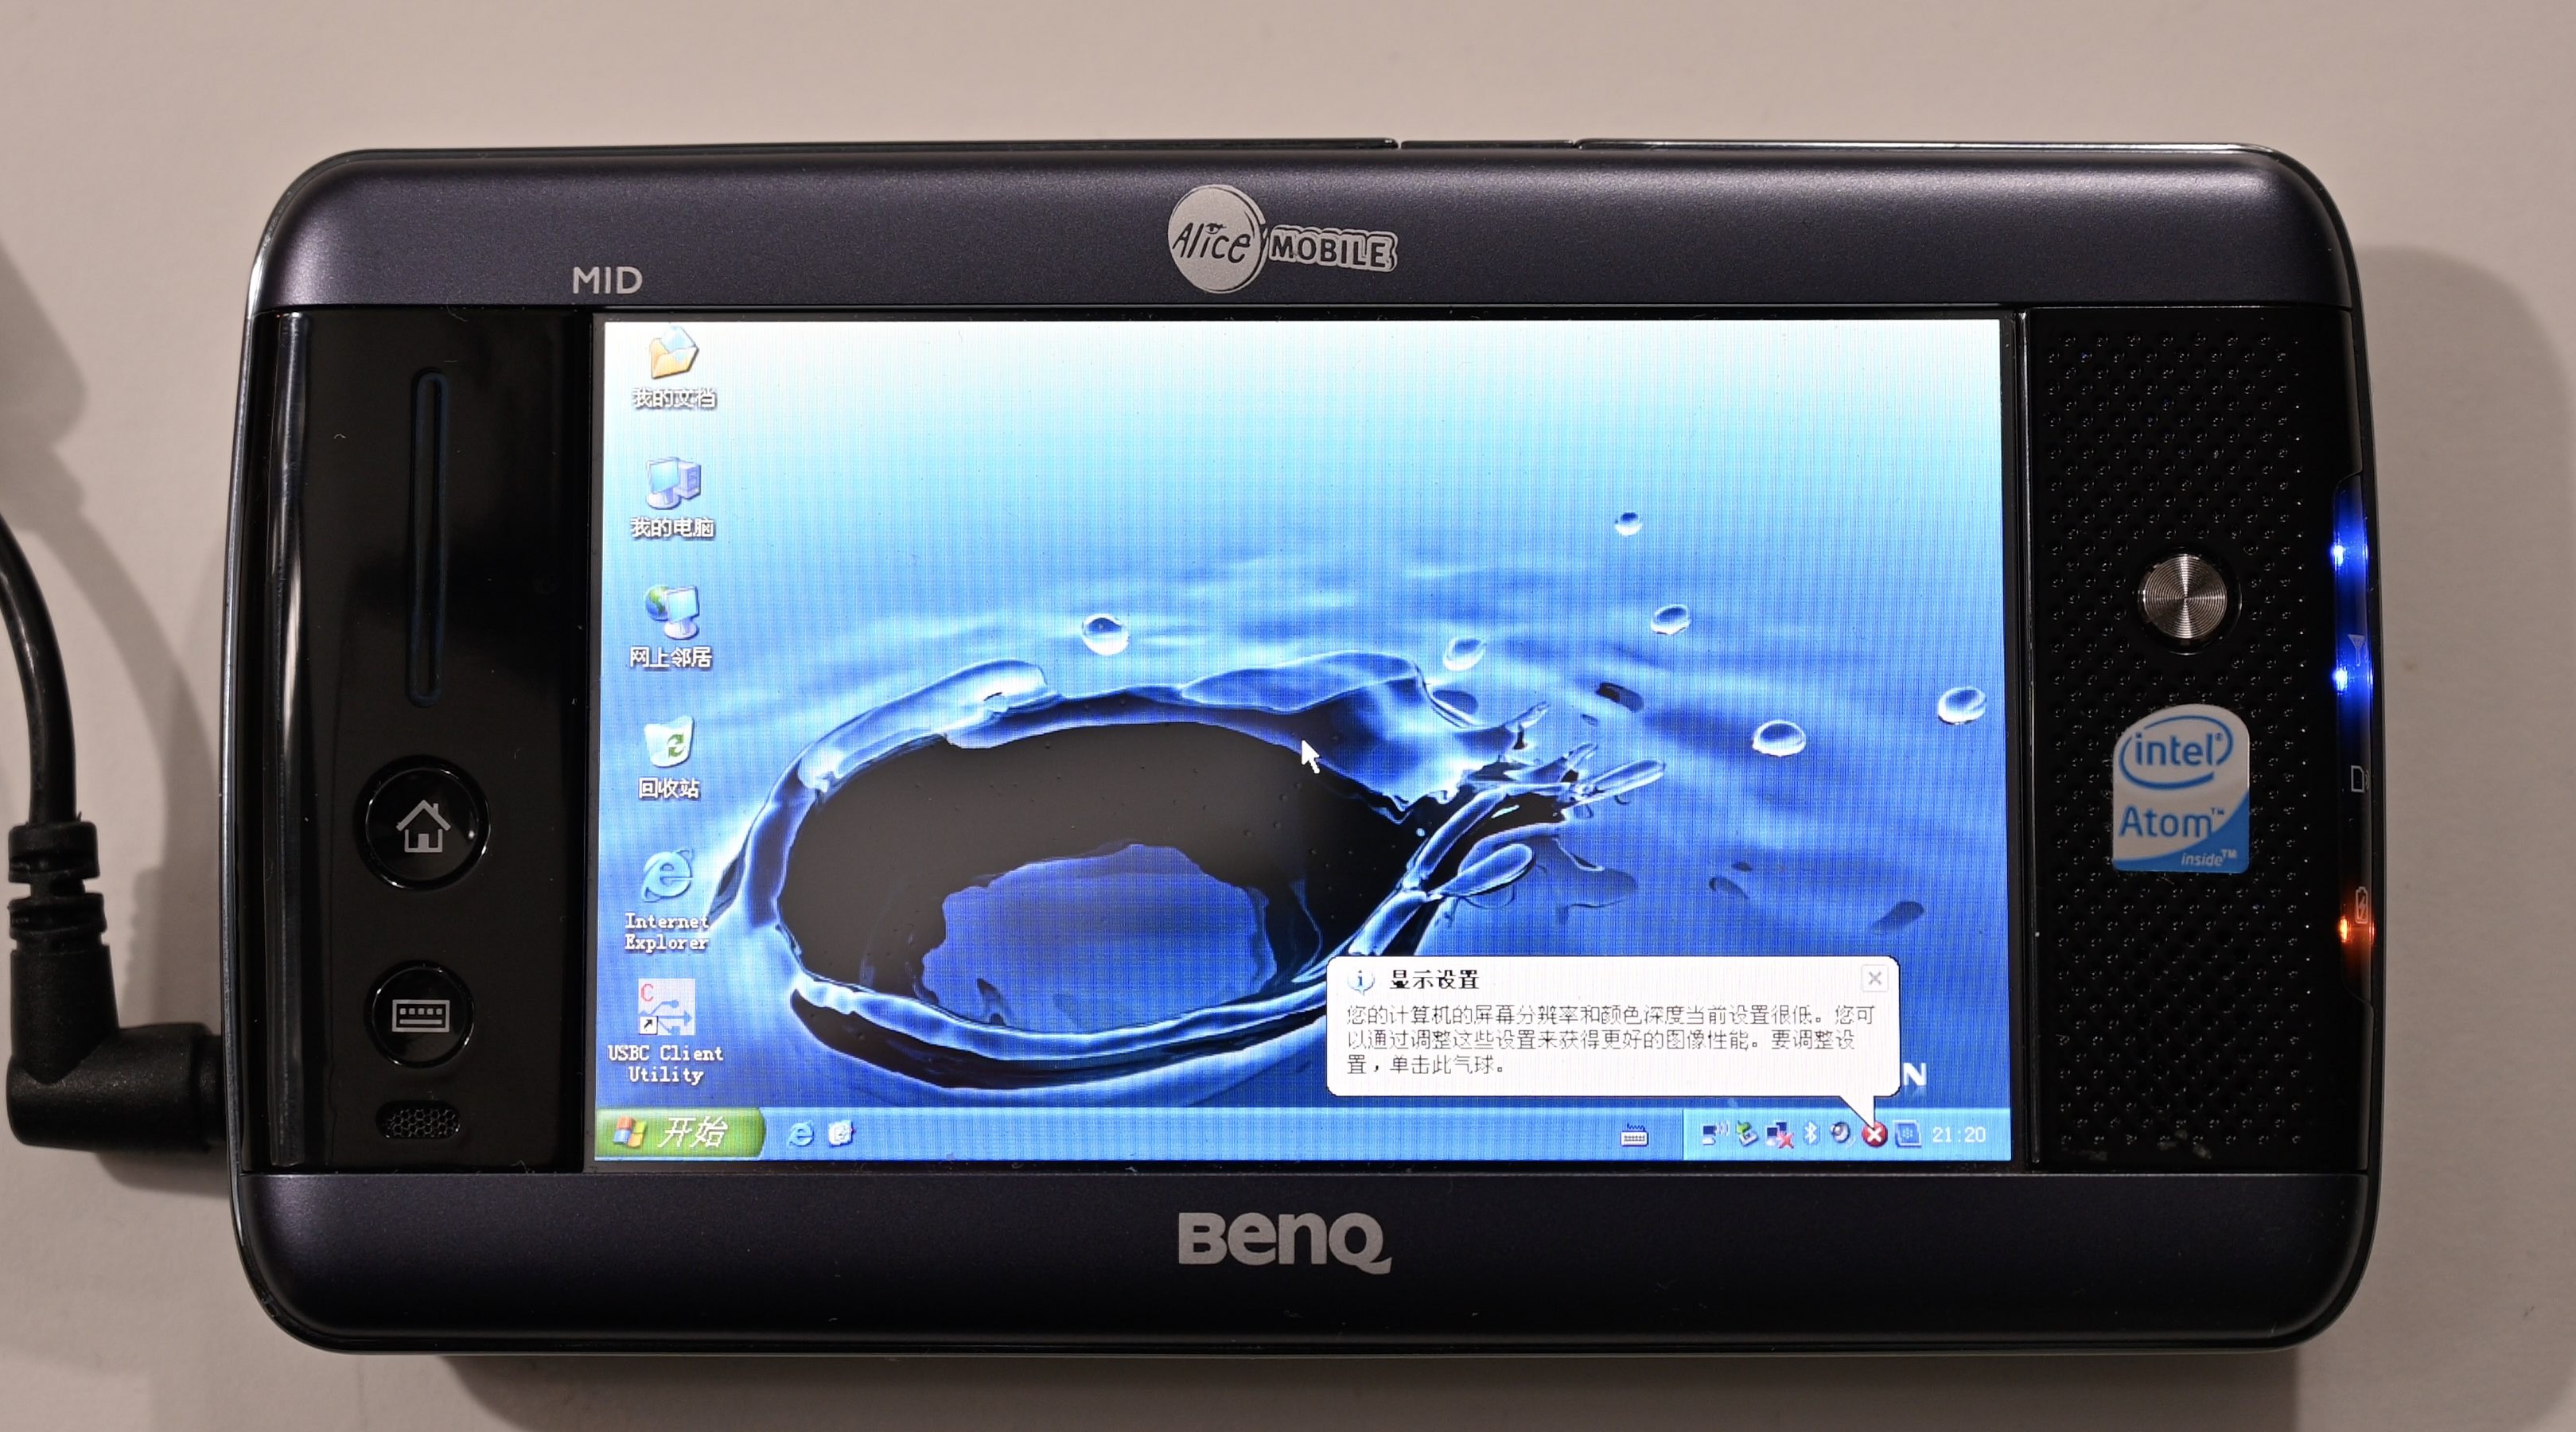
But luckily, alternatives emerged not too long after. The alternative option is called mobile Internet devices, or MID for short. Similar to UMPCs, they are also miniaturized handheld PCs with x86 processors but generally ship with a customized Linux operating system. Benq S6 is one of them, released in 2009. Here lists the spec for this machine:
Intel Atom Z500 processor at 800MHz Intel UL11L SCH with GMA 500 IGP 512 MB RAM 2 GB SSD 4.8" 800x480 LCD with resistive touch screen WiFi and 3G connectivity Linux operating system While the spec isn't great, the Benq S6 is quite affordable, retailing at only about $300. So if one could install Windows on it, that could be a nice way to get into the UMPC bandwagon without breaking the bank.
Luckily, installing Windows on S6 is not that hard. It has a fairly standard AMI BIOS and supports booting over USB. So one could just hook up a USB thumb drive, or a USB CD-ROM drive like in 2009, to install the Windows. Drivers could be found online, and there is a community-built software called MID utilities to control the WiFi and 3G. But one would soon find a huge limiting issue: the 2GB SSD. It is simply not enough to hold all the stuff. A typical Windows XP installation alone could take up 1.5GB. Sure you could trim it down as probably every S6 owner would do, but that's still quite limiting.
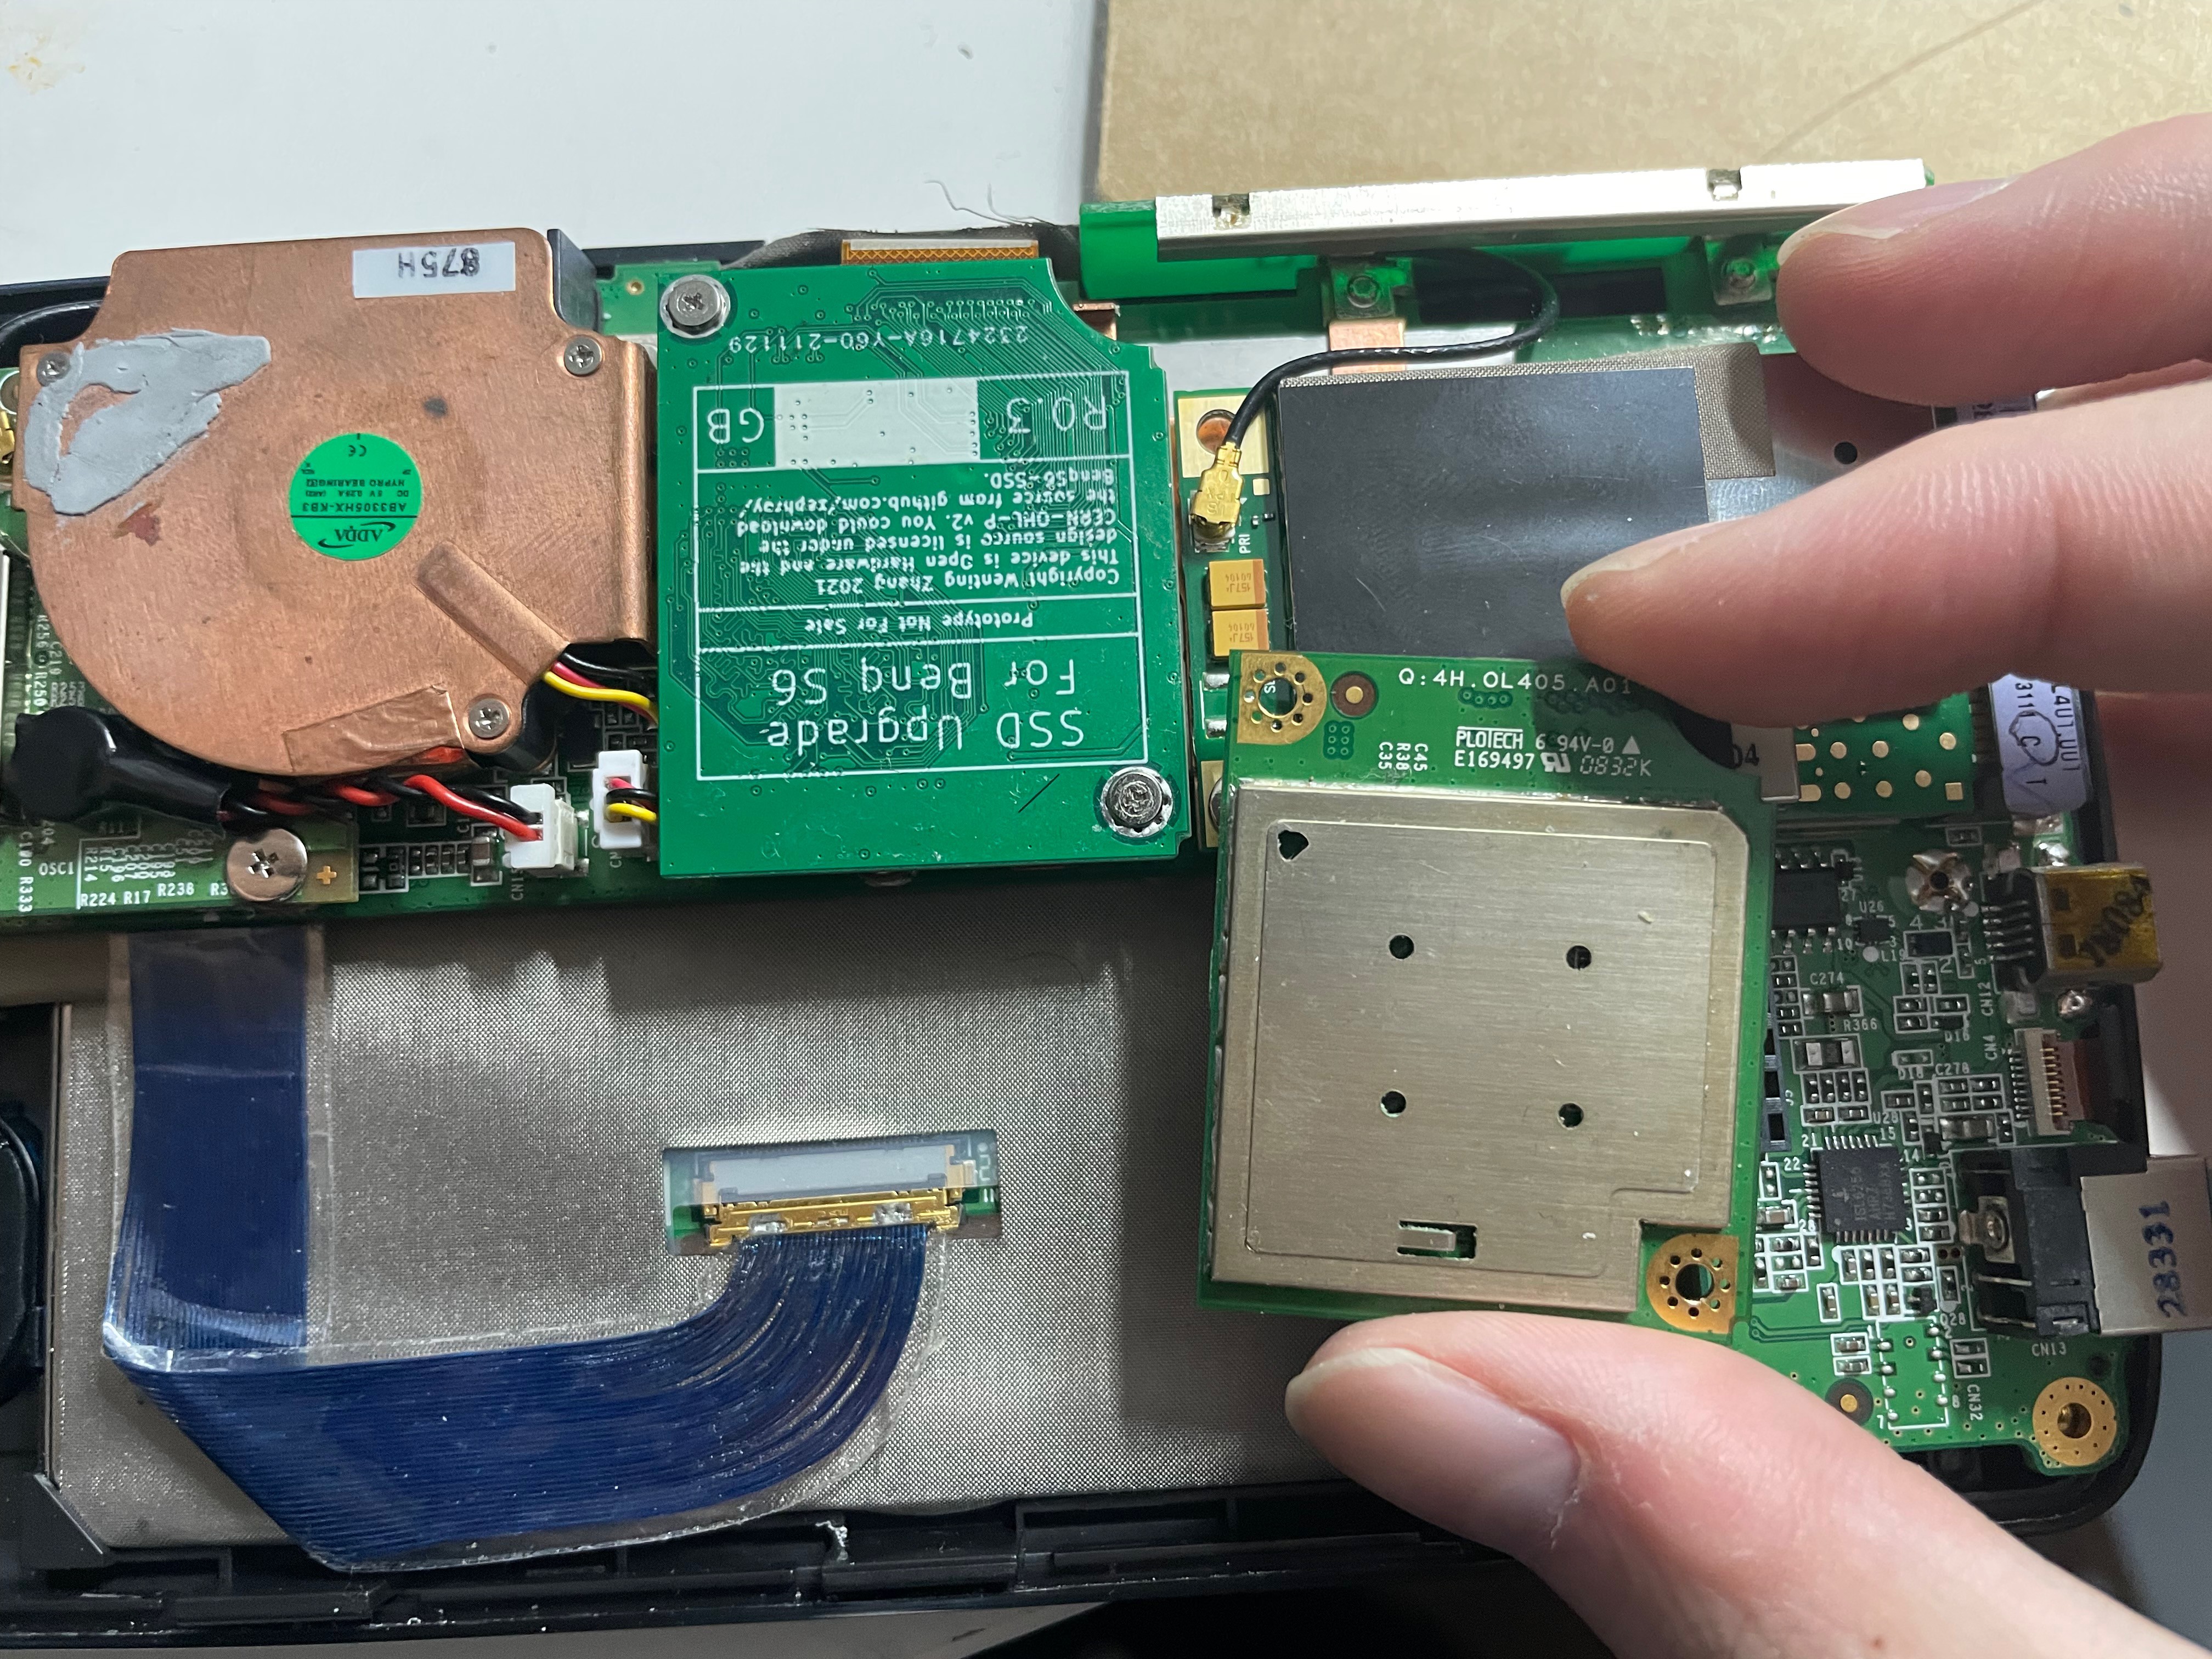
Unless there is a way to upgrade the SSD for more capacity. It shouldn't be that hard, right? To upgrade the SSD let's first take it apart. It's held together with 4 screws on the back. After removing them the back case could be removed with some effort. And then we could see the... pathetic 2GB SSD.
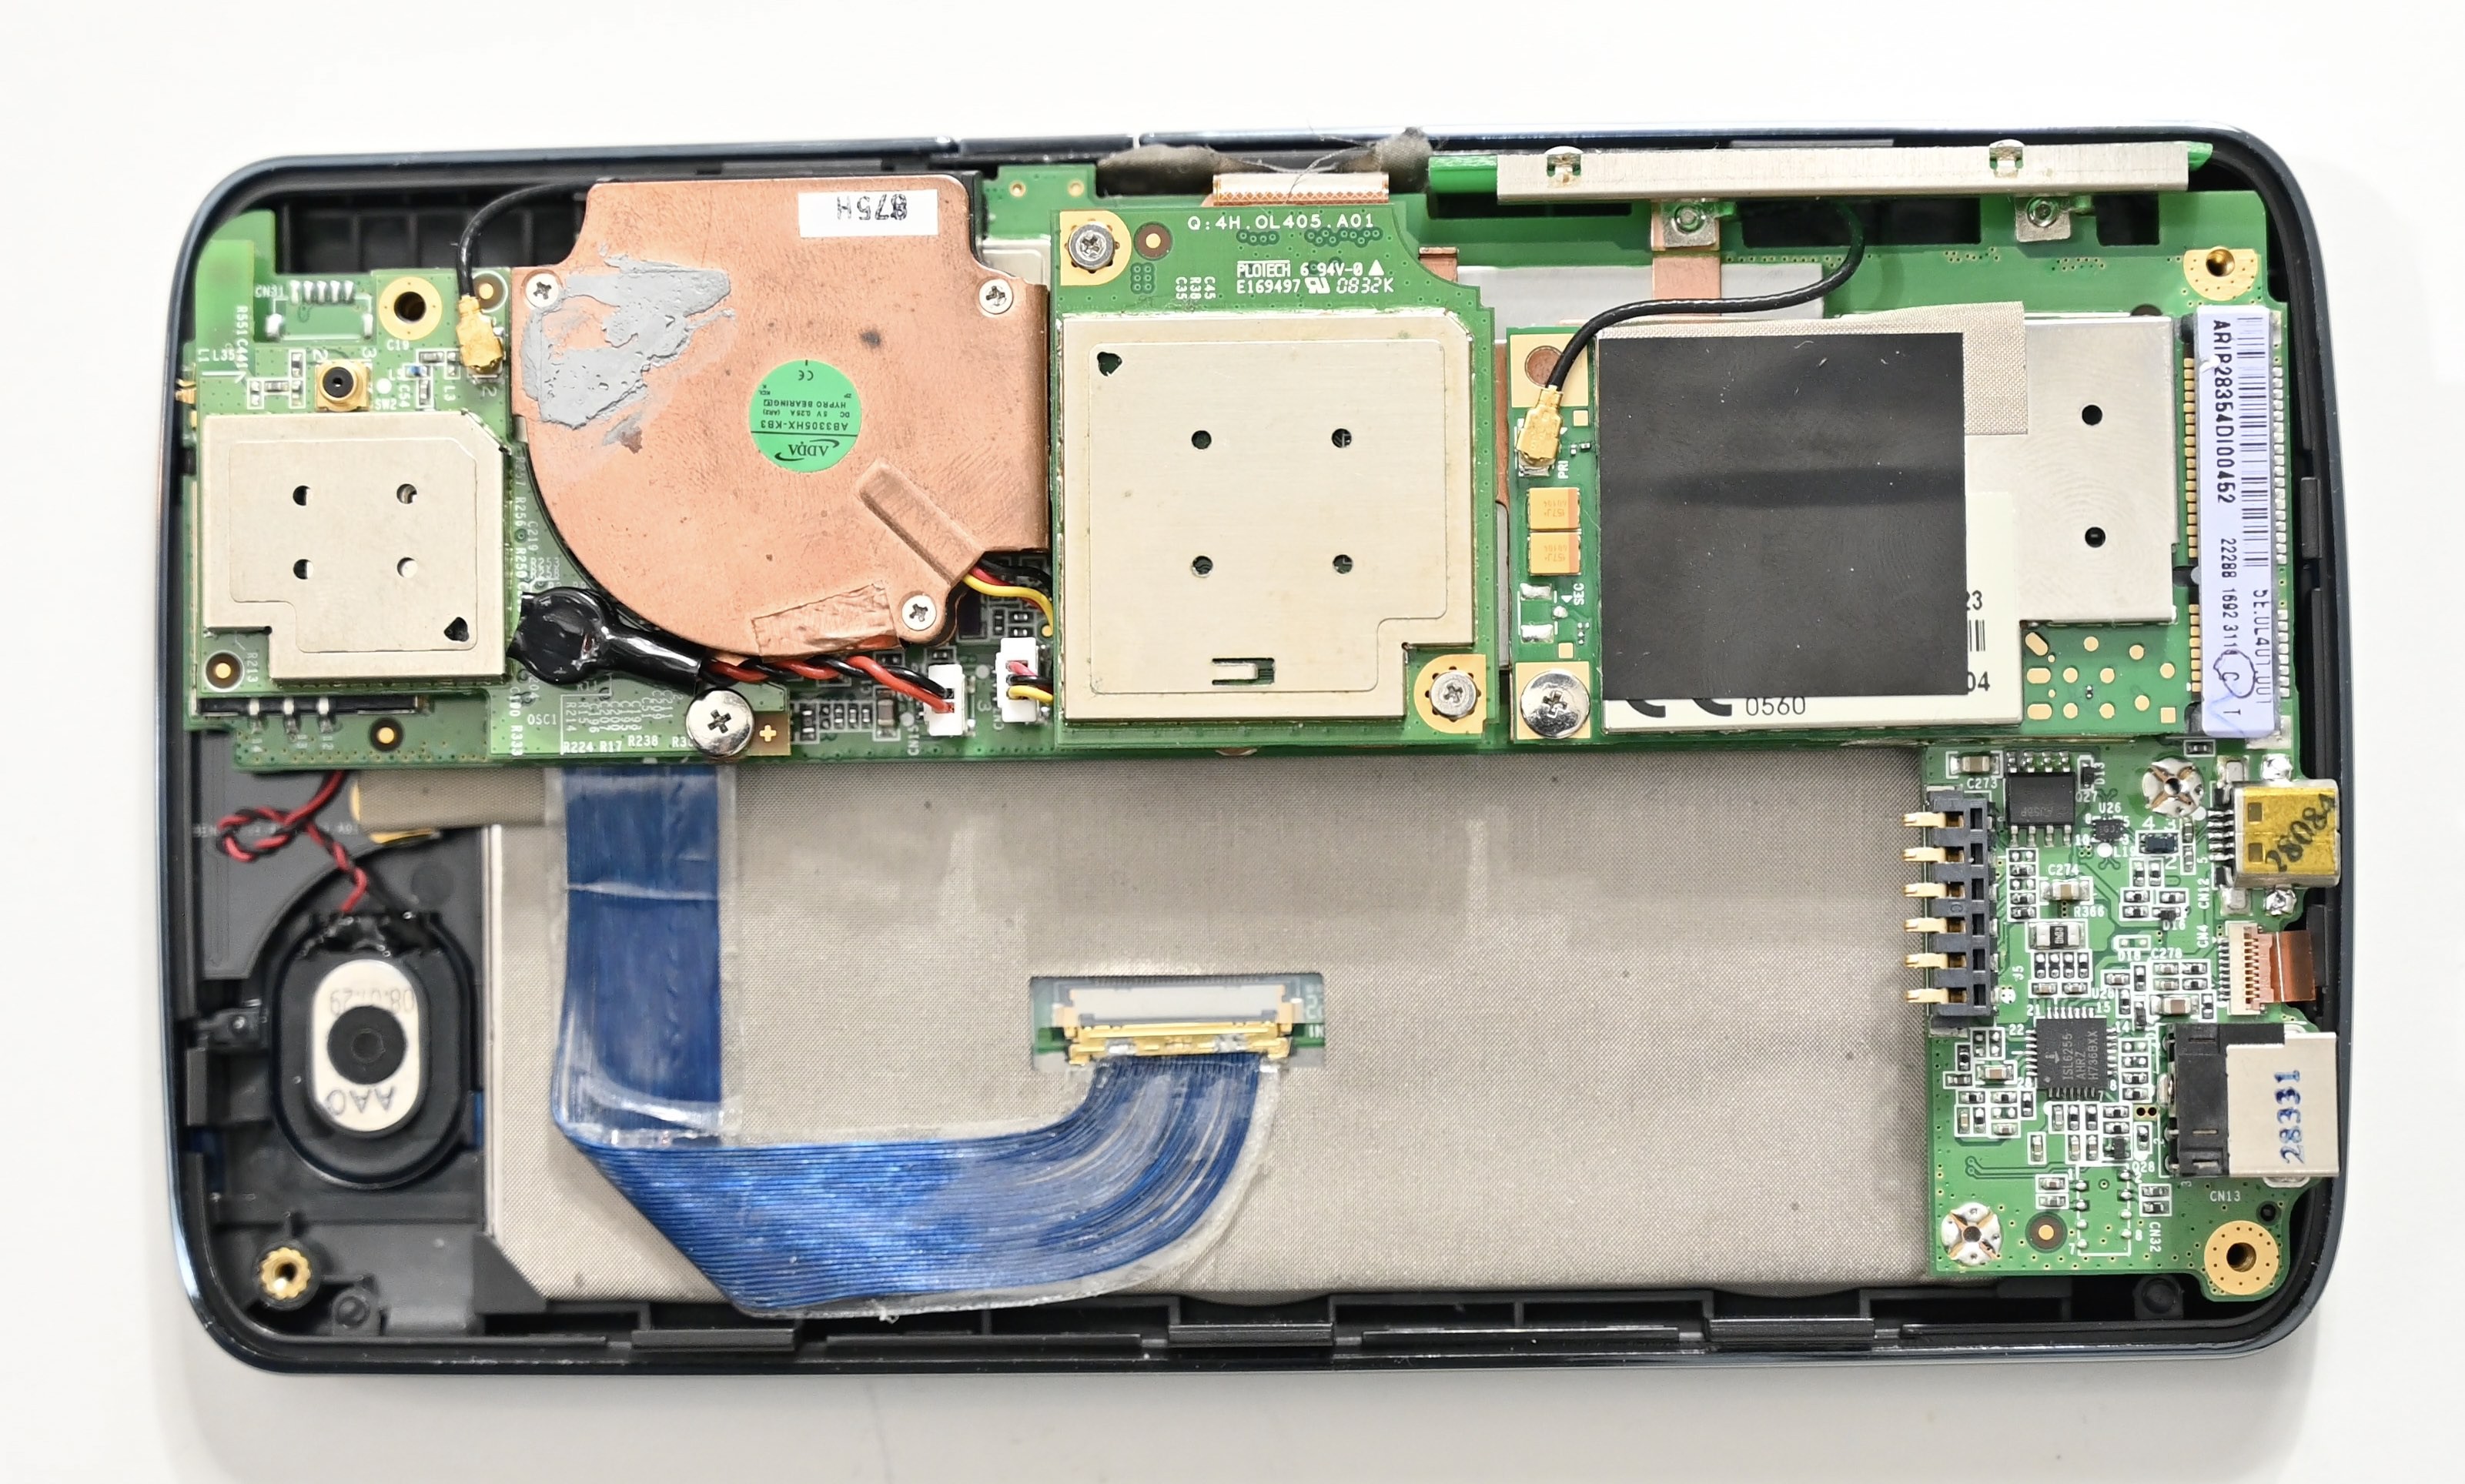
It uses a non-standard connector and a non-standard form factor. Typically when dealing with such cases, one would use an adapter board to use like a CF card or mSATA SSD. Here it's not only physically smaller than CF cards or mSATA SSD but also quite thin. There is just not much room for an adapter. As a result, if one tries to search for an S6 SSD upgrade online, the solutions all require people to cut a slot in the back of the machine to accommodate the SSD. I am not satisfied with that, so I am going to develop my own solution.
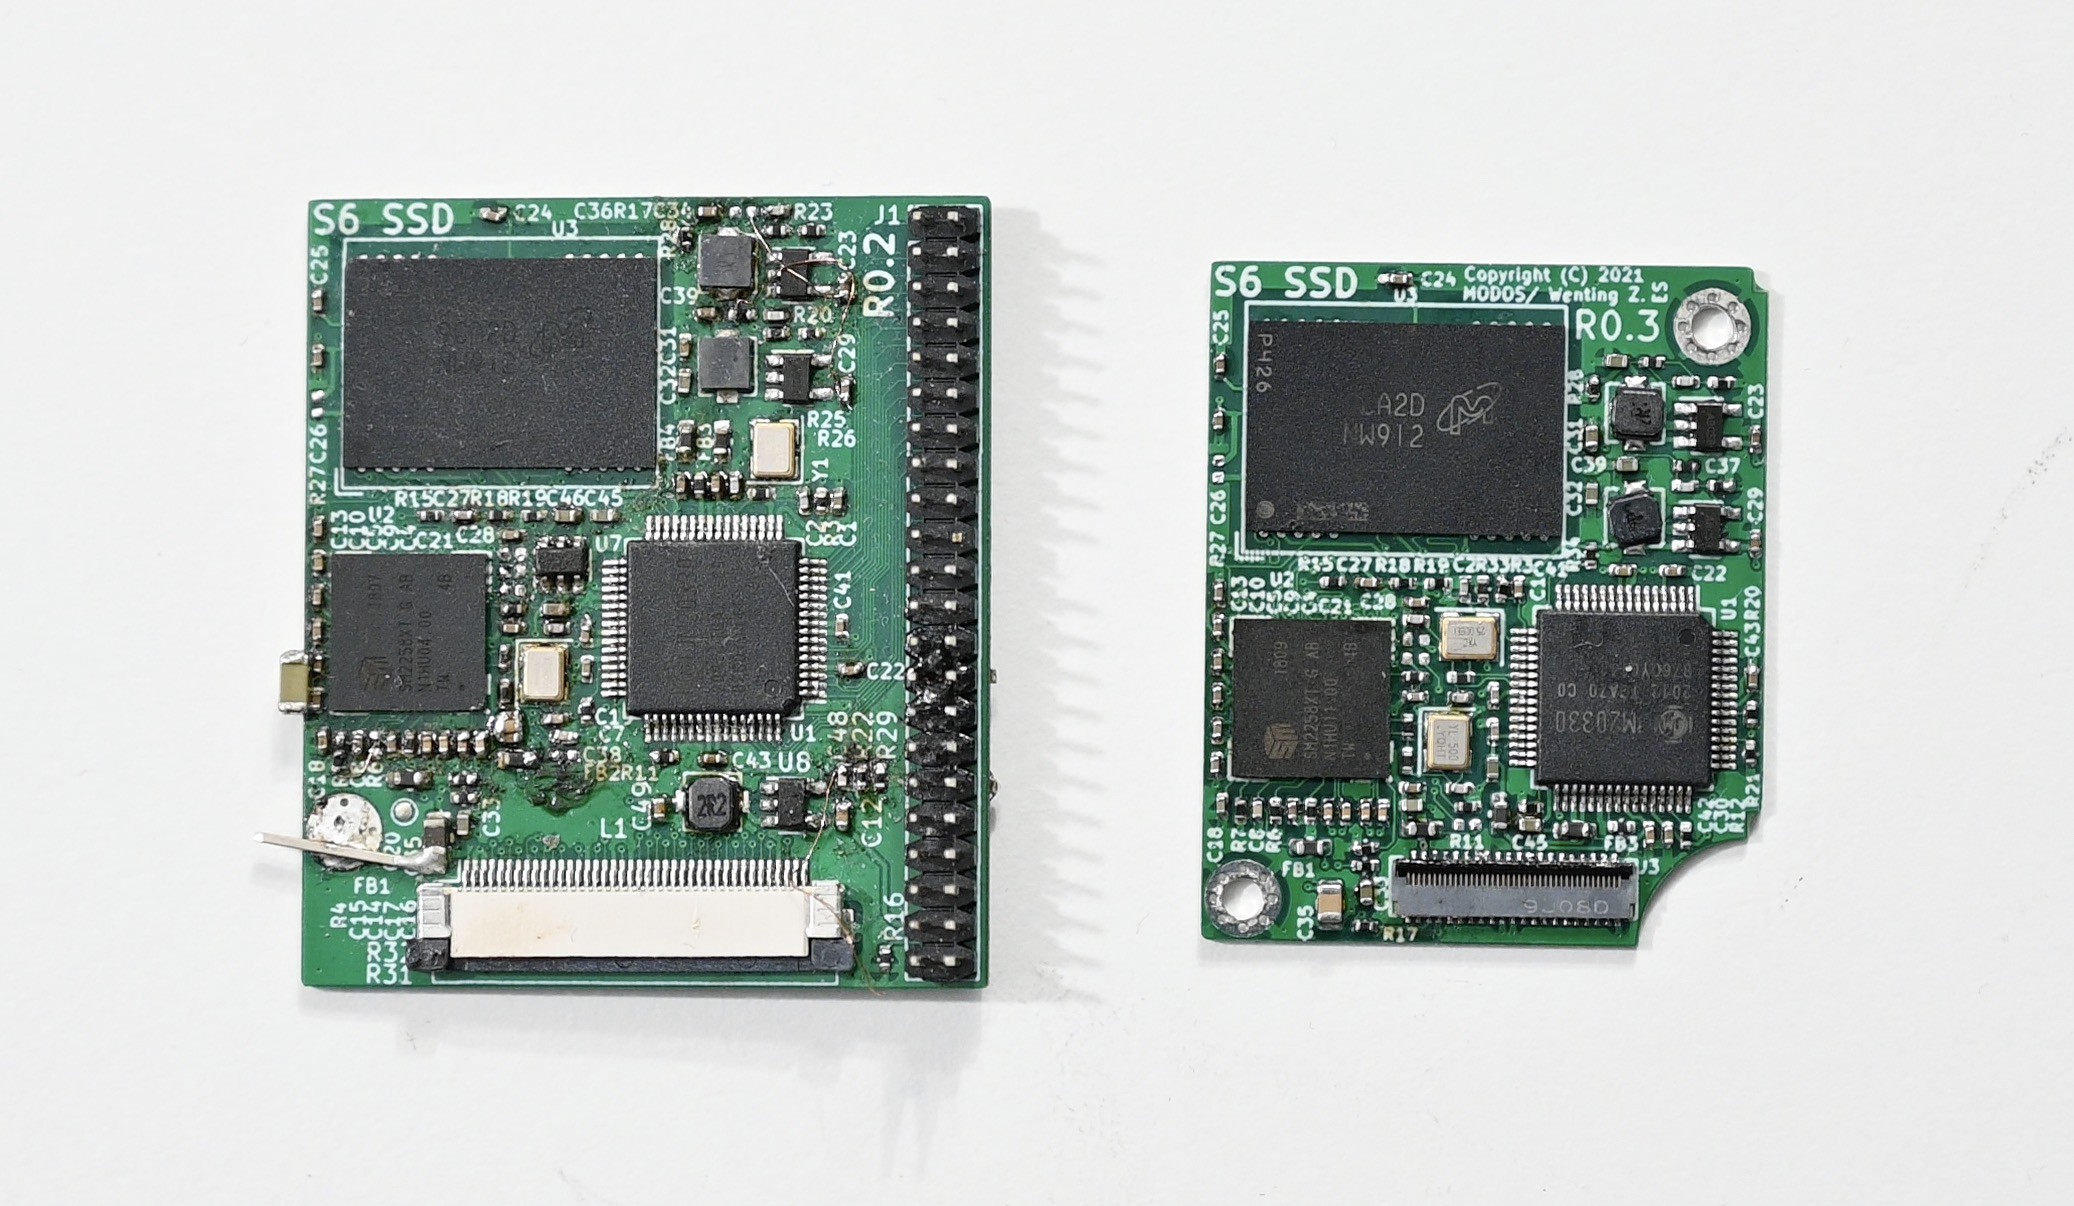
The plan is simple, I am going to build an SSD myself that would fit here. Despite using a proprietary connector, the protocol is just plain ATA or IDE. SSD controllers typically use SATA nowadays so a bridge chip is needed. Next is about designing the PCB. Most of the related information is confidential which I don't have access to, so I bought an IDE to SATA converter board and a cheap SSD and reverse-engineered them.
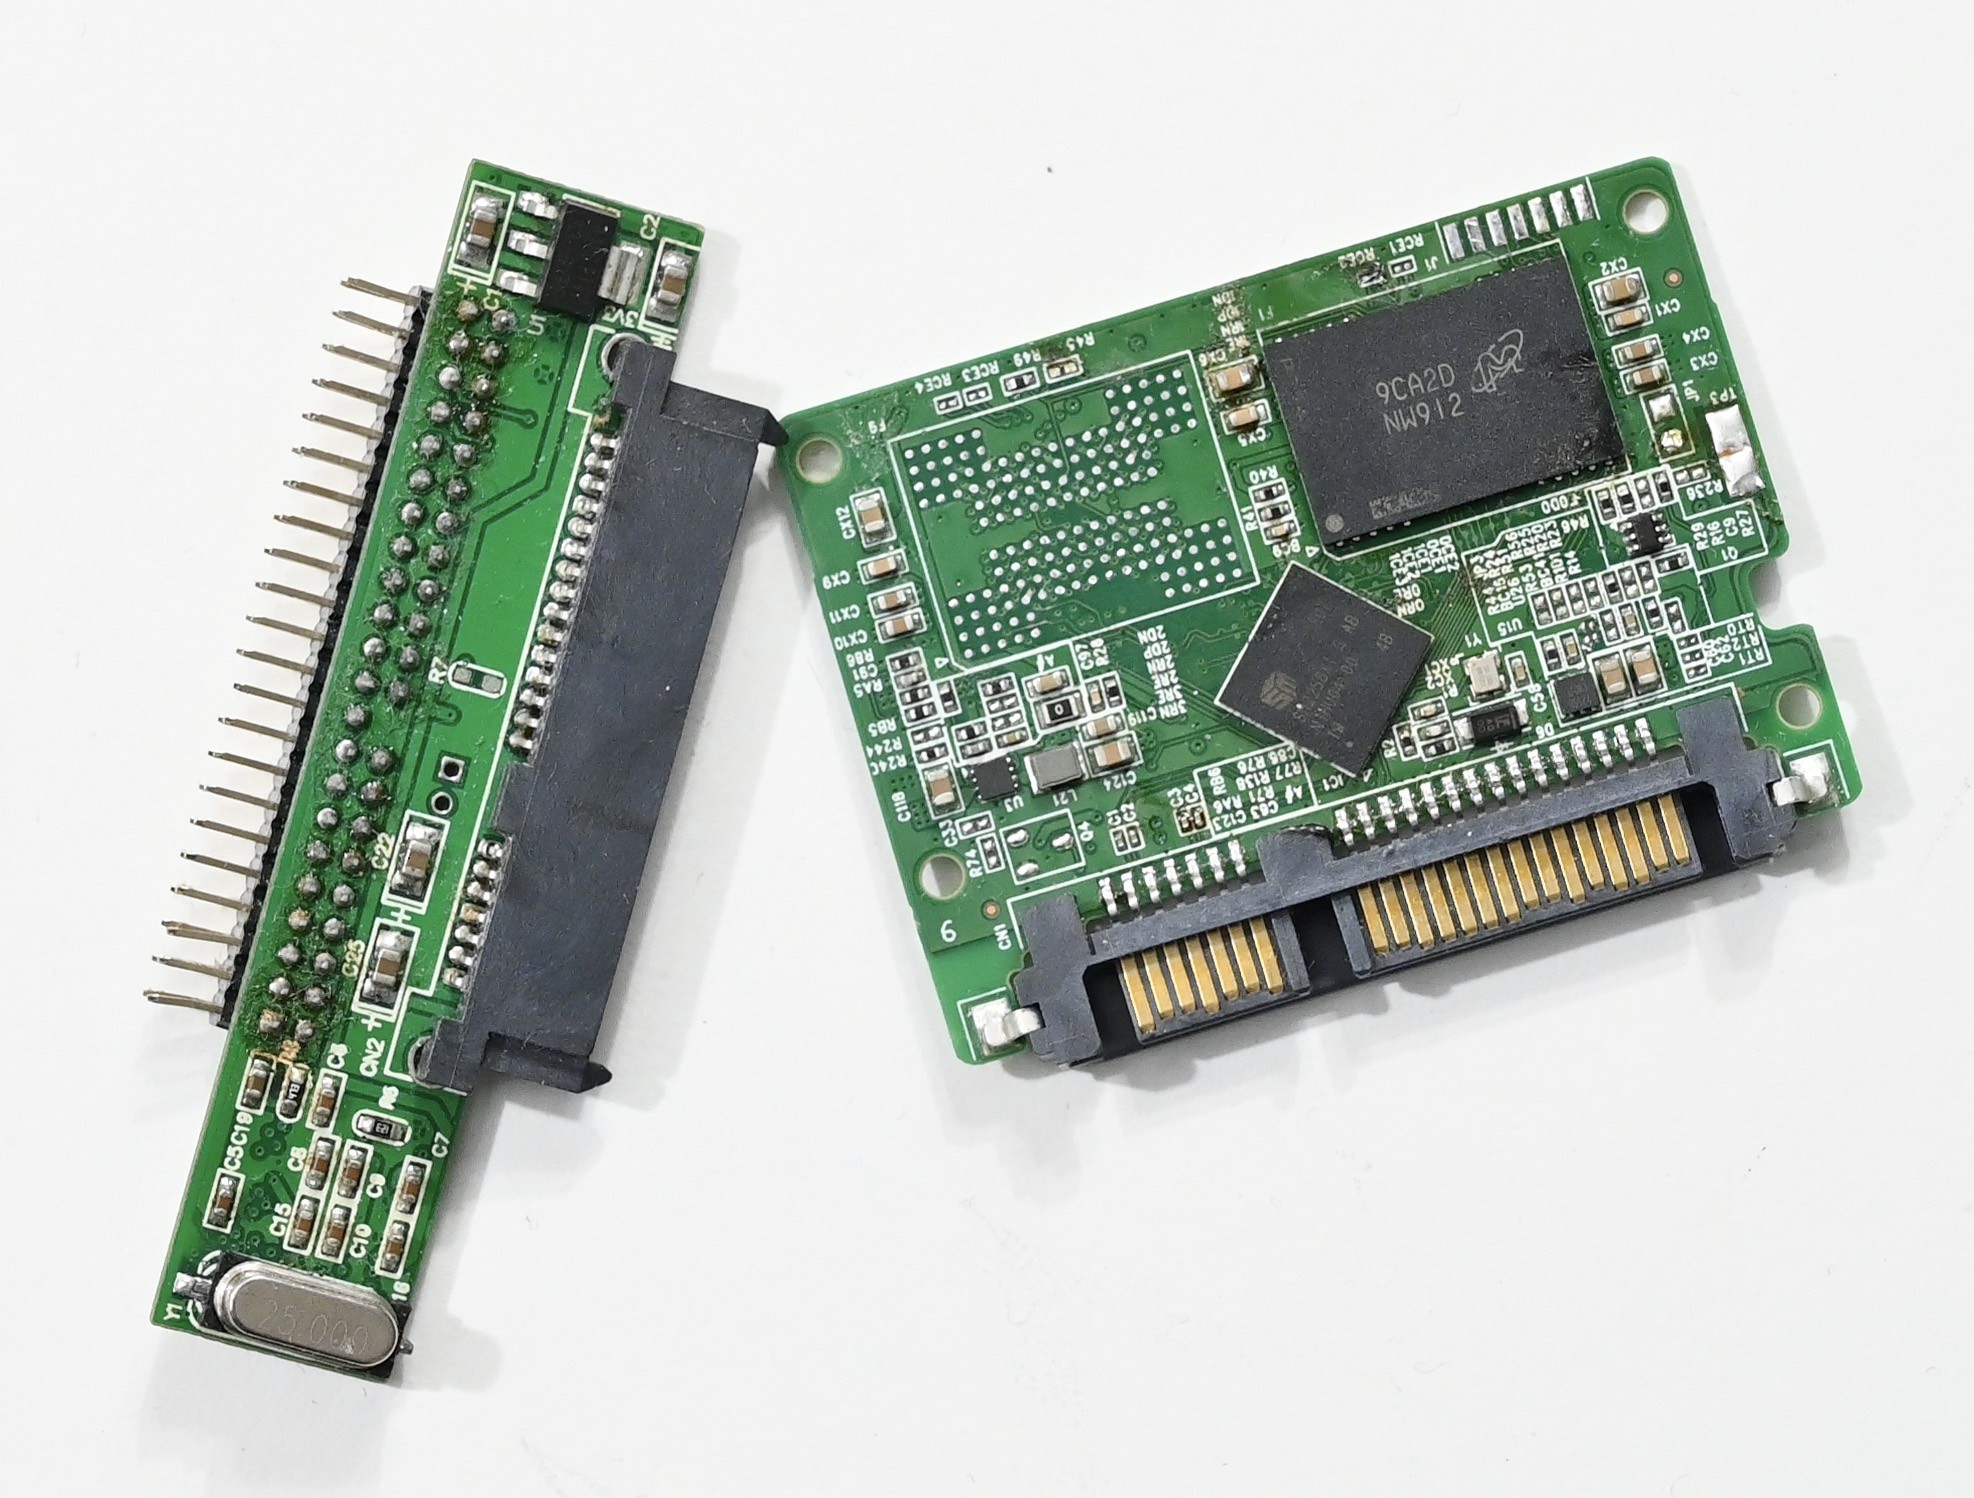
To be fair I did find some information such as the datasheet for a different but similar SSD controller on Google. Combining the datasheet, measurements were done on the board, and some guesswork, I built these PCBs.
Here is the screenshot for the schematic and PCB layout:
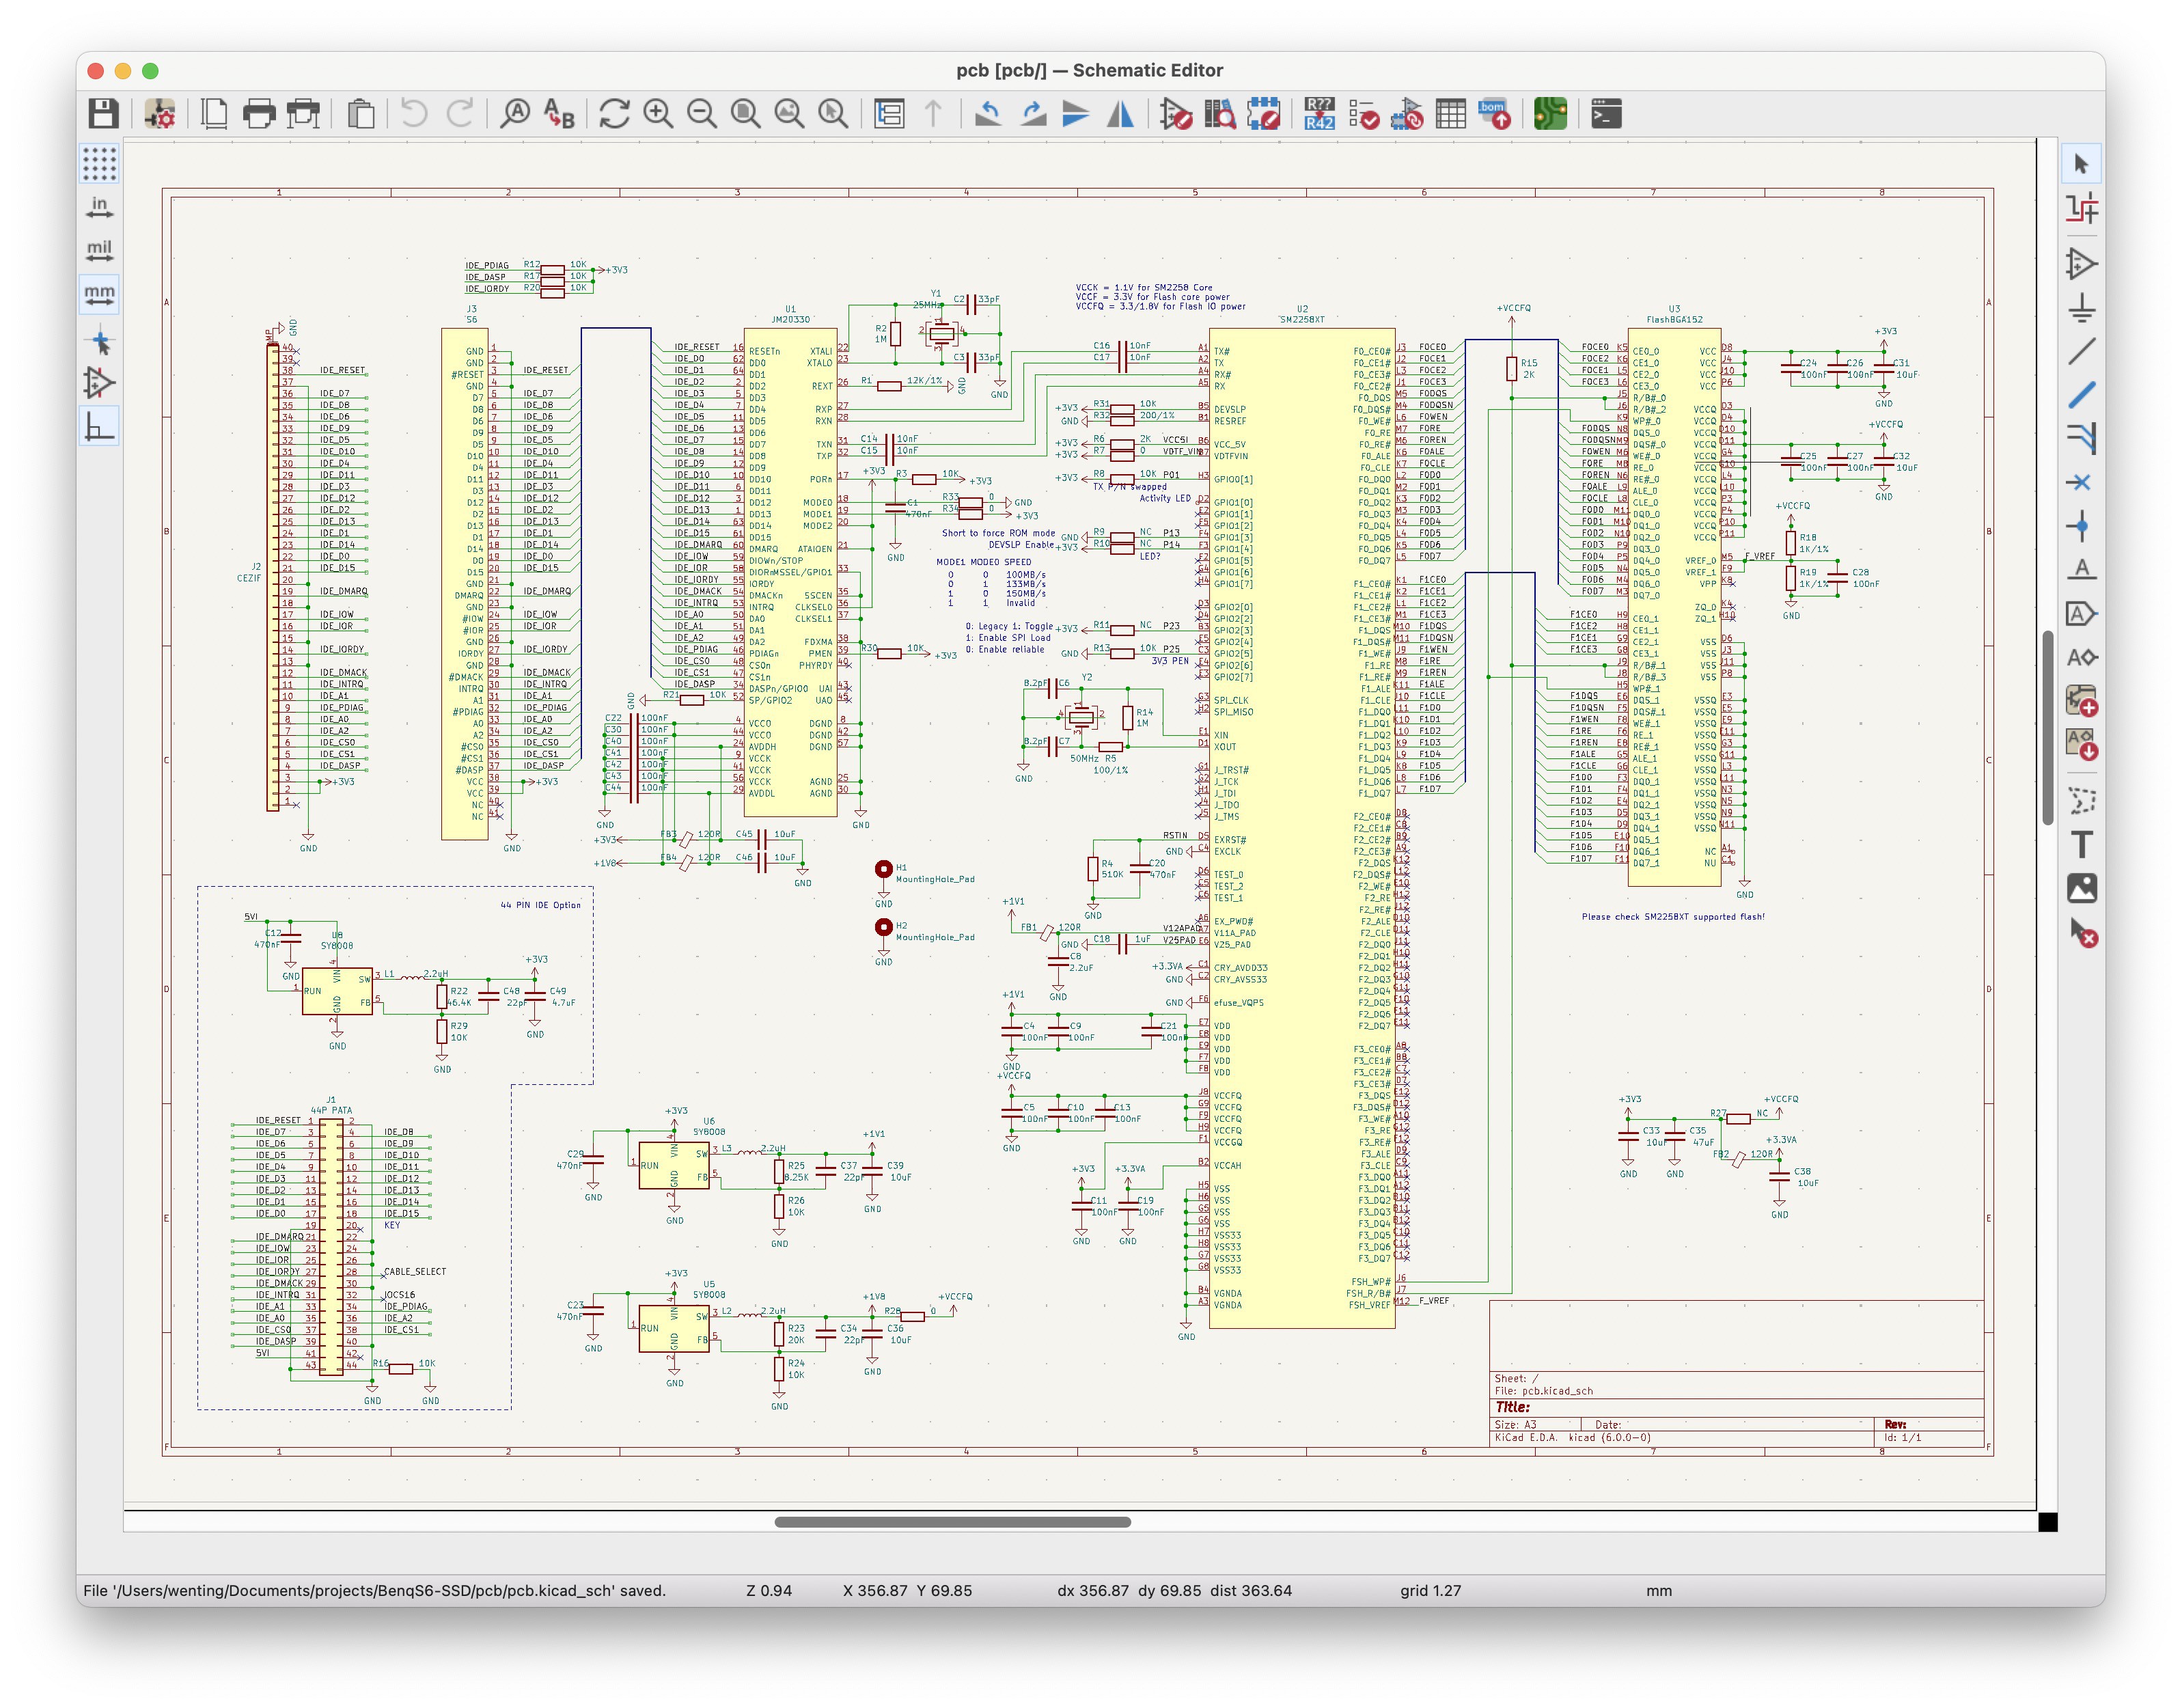
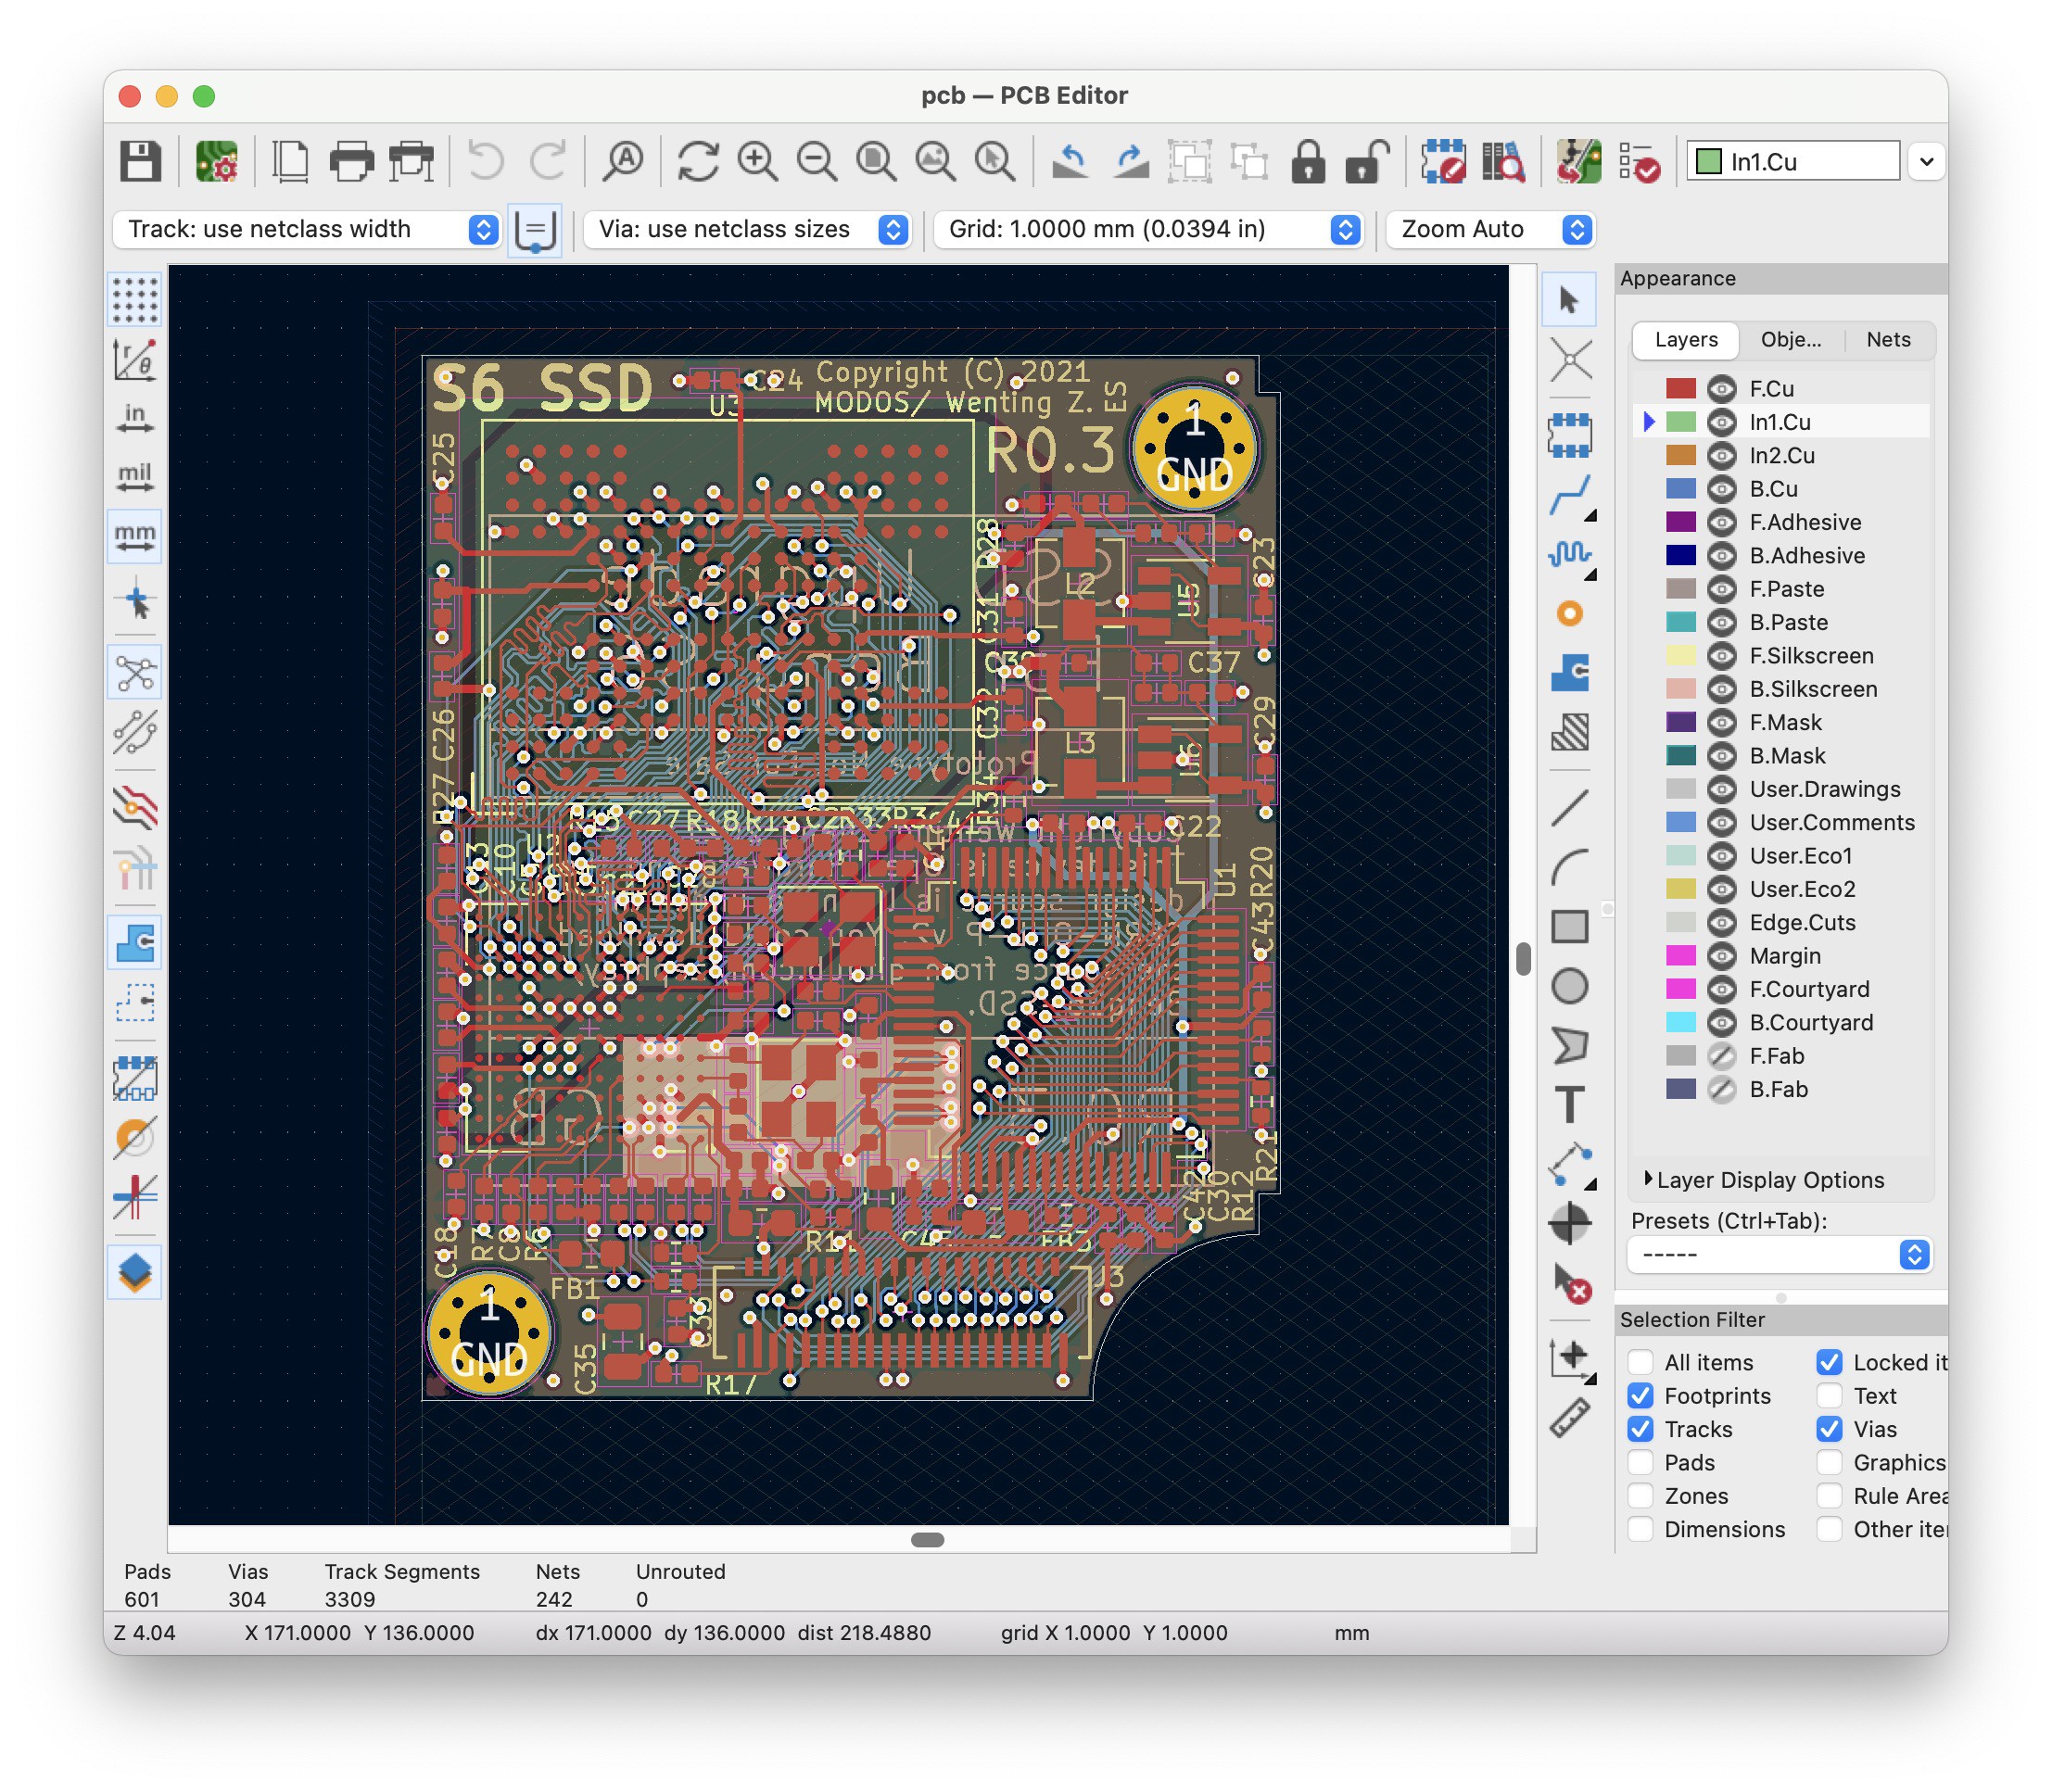
In case you wonder, the entire design is open source under a permissive license, available on GitHub.
To use the just hand-assembled SSD, the first task is to initialize it. This process involves using the so-called mass production tool, though I am not really mass-producing it. Initially, my idea was to run this tool directly on the machine, but it turns out that the screen resolution is not high enough so I couldn't hit the START button...
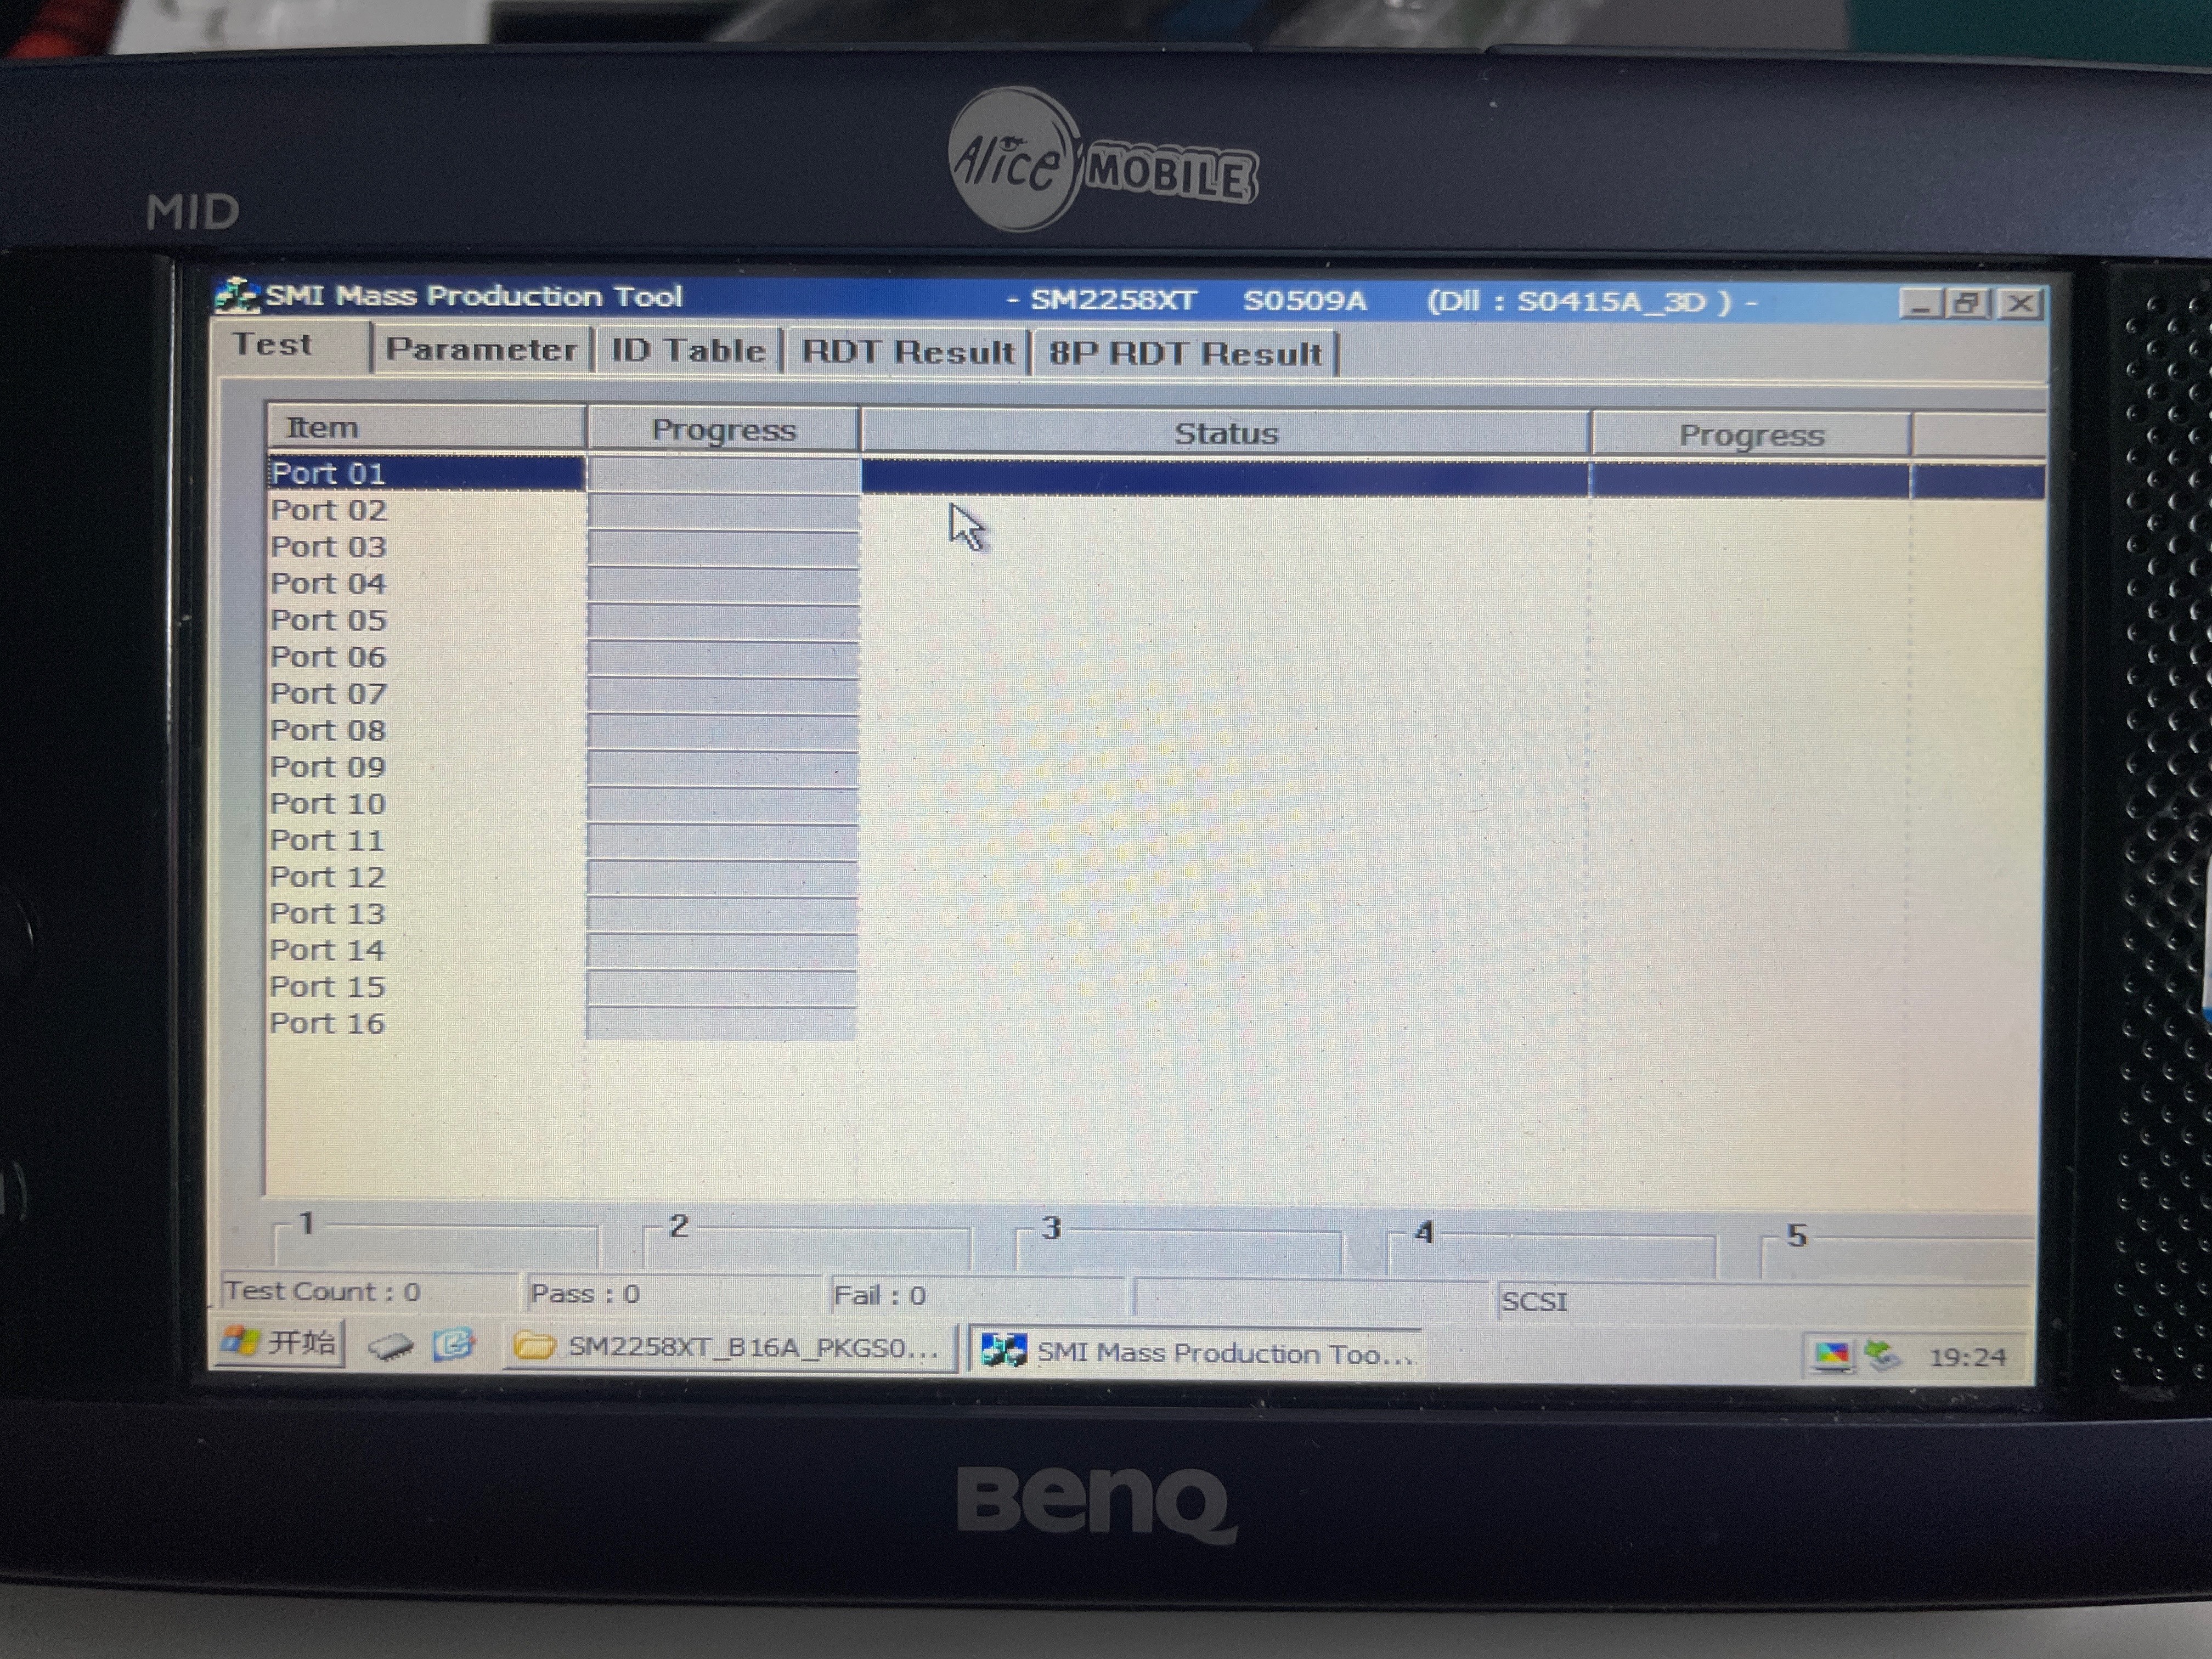
Then I tried using Windows-to-go to boot Windows 7 off my USB hard drive then I could connect to it using a remote desktop and run the tool. Then I just got the error saying it fails to initialize the disk. Searching online suggests it's probably a compatibility issue, and I should try using an USB bridge instead of connecting directly to the motherboard. As a result I reused the 2nd revision PCB to build a converter board to initialize it over USB. Now it works.
Then it could be installed into the machine.
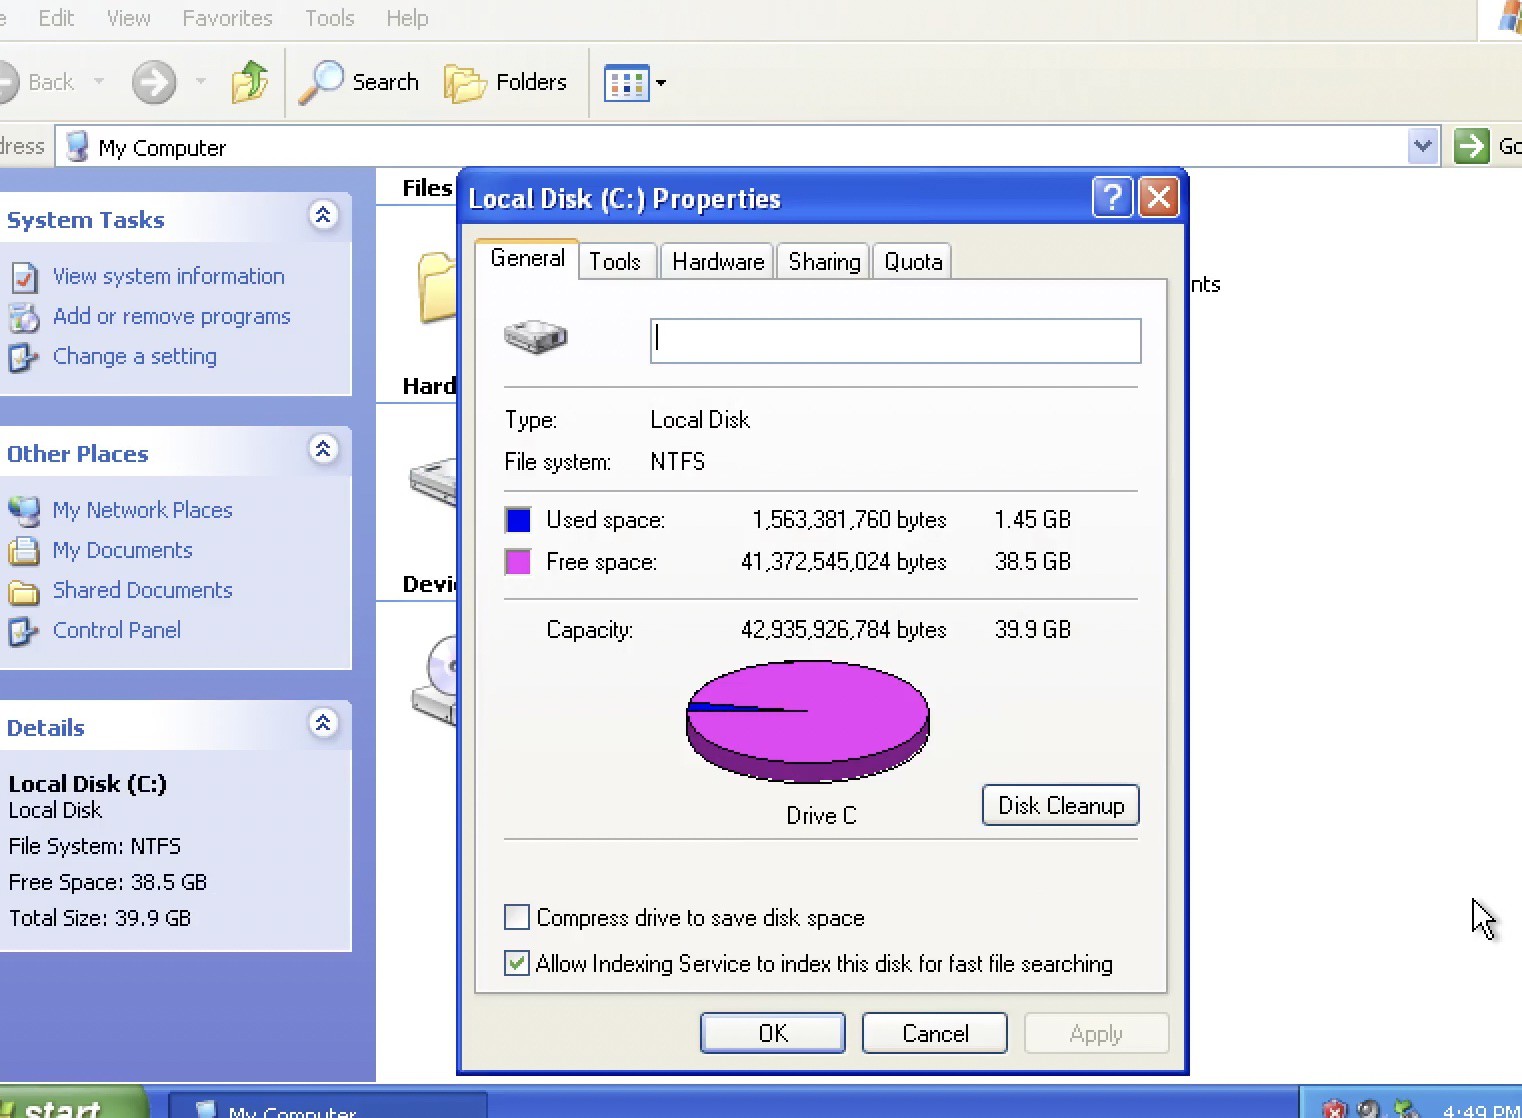
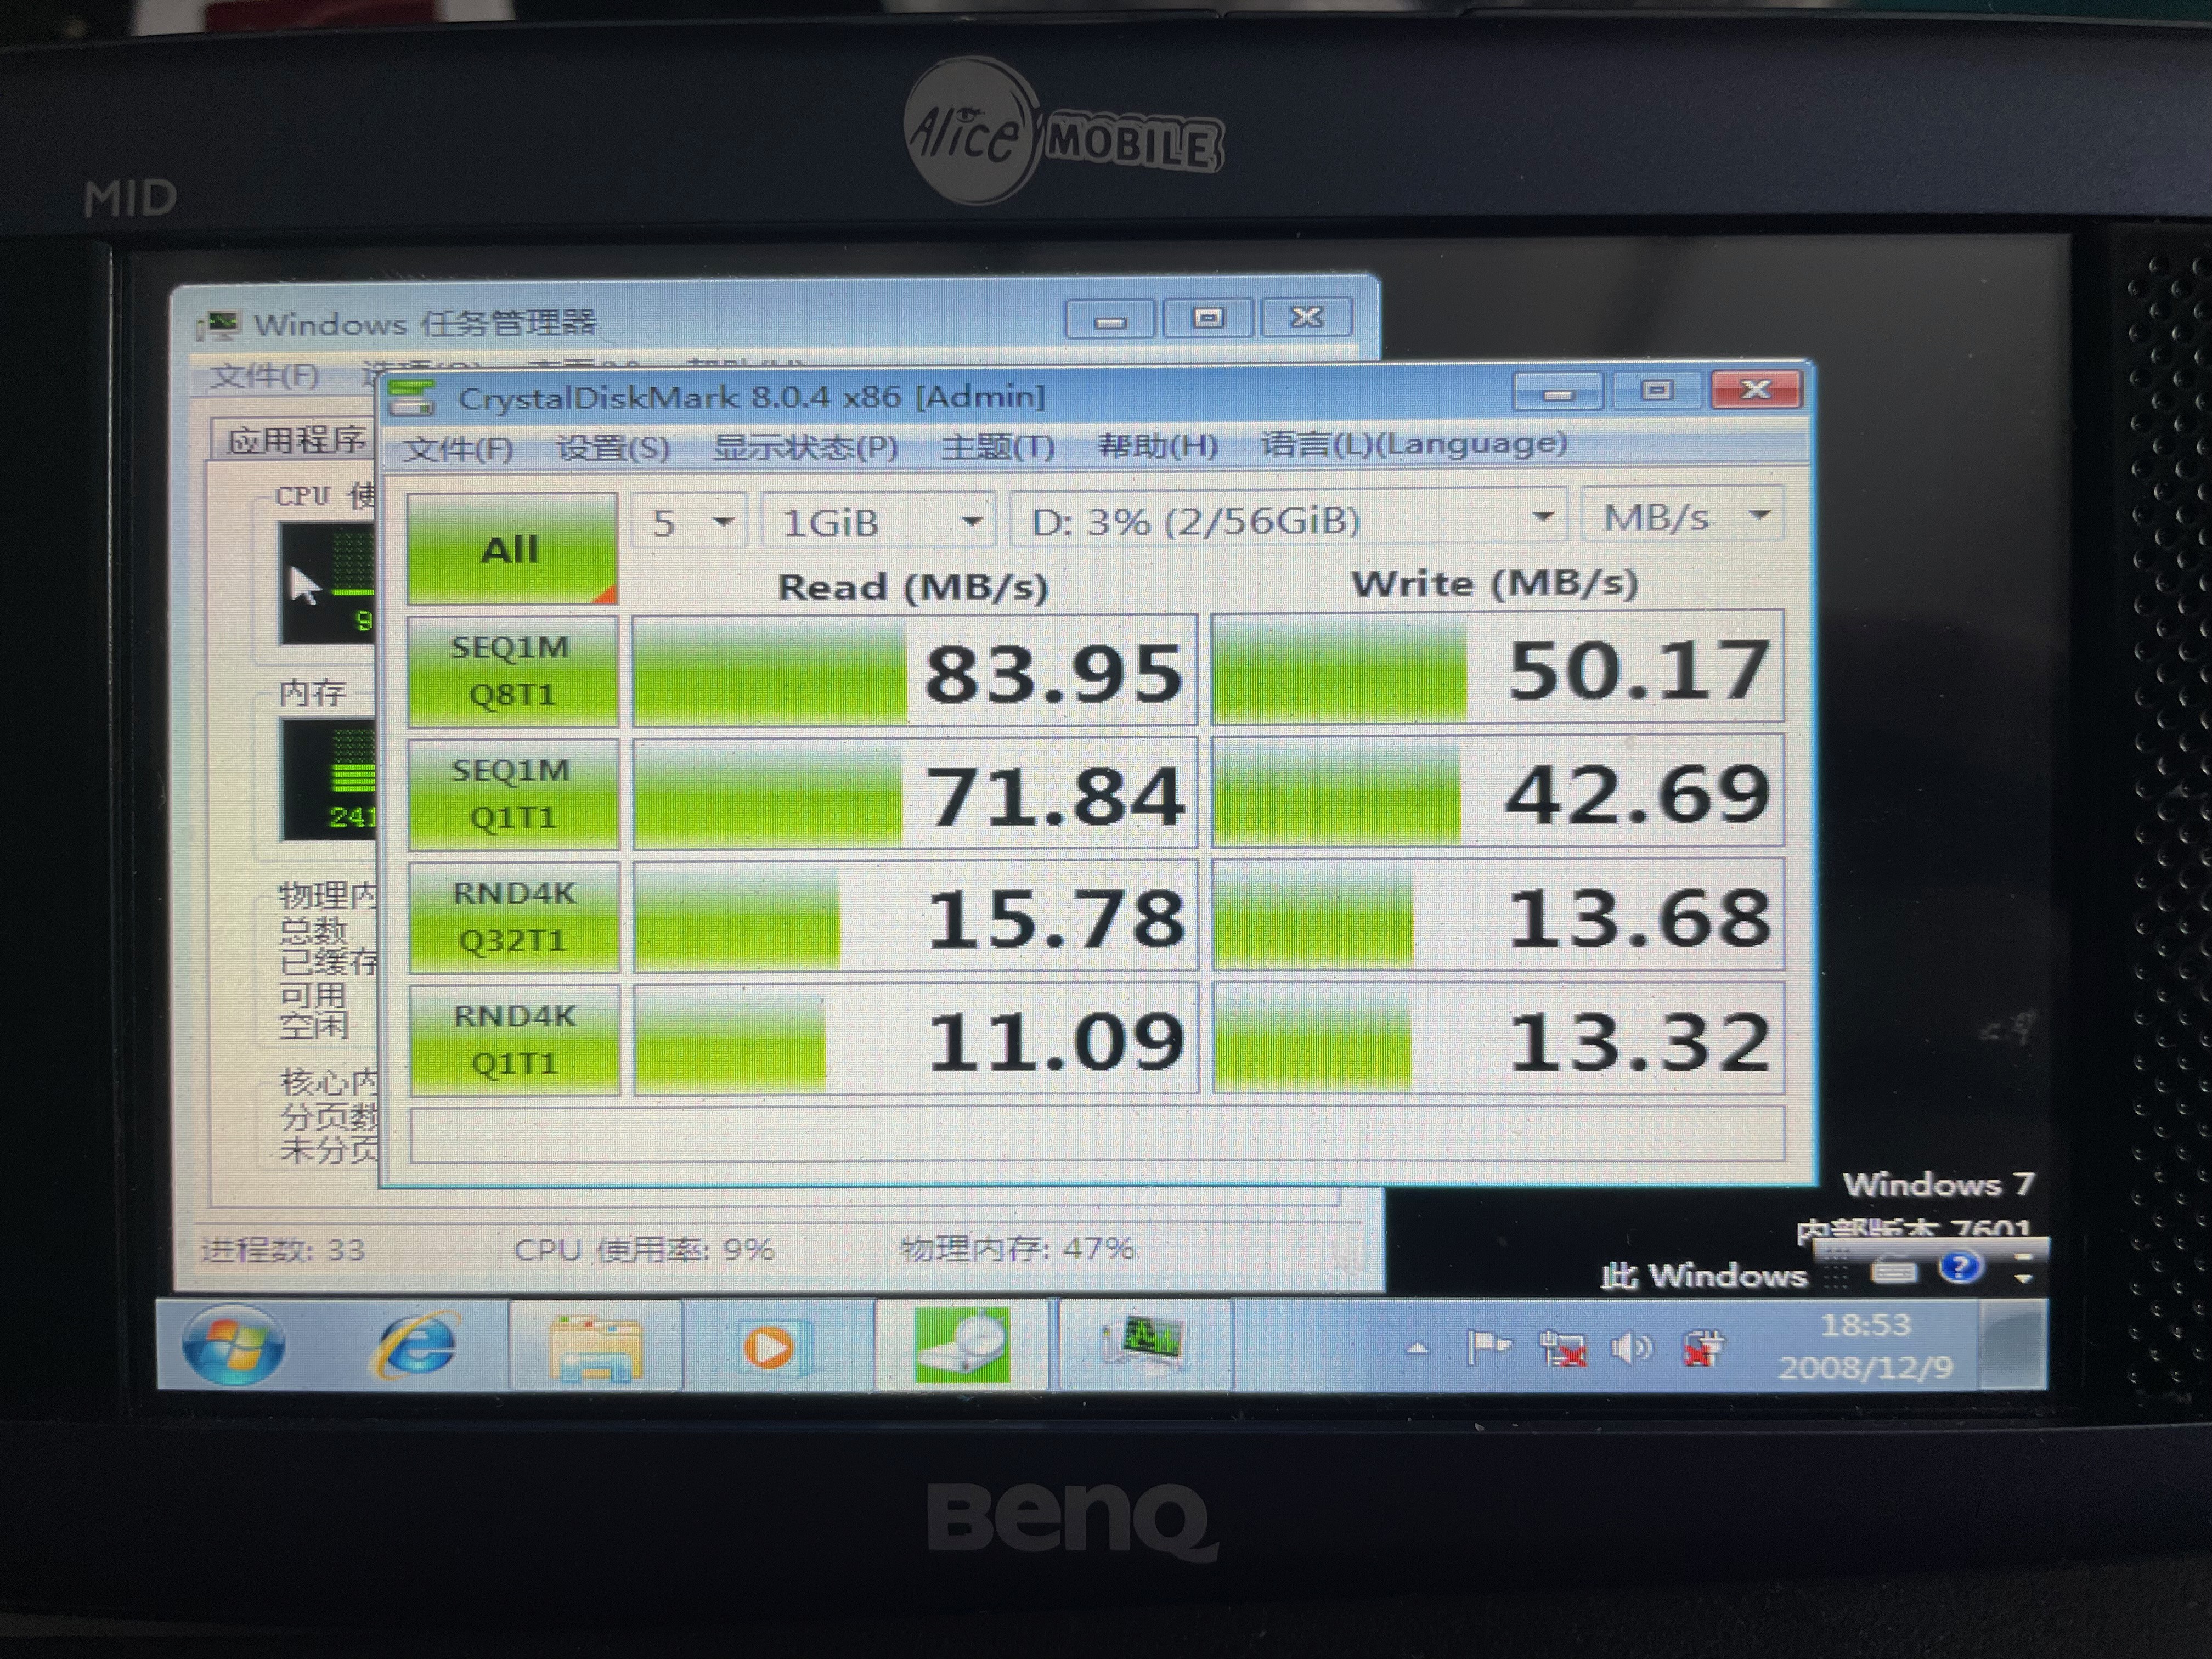
Now I could run some benchmarks to see how fast it is. In the device manager, it says the disk is currently running in Ultra DMA mode 5, which is up to 100MB/s. Running the CrystalDiskMark shows a read speed of about 74MB and a write speed of about 32MB.

If running in Windows 7 the speed could be up to 84 and 50.
But given the 512MB of RAM and extremely weak CPU, probably Windows XP is the way to go. Some viewers would probably suggest running Linux on it, yes that's a valid suggestion. But somehow I feel like, Linux runs about everywhere, it's not all that exciting to see Linux running on a handheld device than seeing Windows XP running there. We came here for the x86 processor after all.
This is all for this project, thanks for reading.
Additional notes you want to build your own:
The design could be reused to build CE/ IDE SSD. However one needs to pay special attention to the UDMA mode: JM20330 allows limiting the speed down to UDMA5/100, however depending on the converter board/ IDE cable/ motherboard combination this may not work reliable. Manually limiting the speed mode to UDMA4 or even UDMA3 might be required for it to work reliably.